Tag: Android
-

Create Android Phonegap HTML5 project
01. Install Android Studio. Verify that JDK installed, if not then download and install it from here. 02. Create example project of hello world. 03. Run the project on AVD (Android Virtual Device) – Verify everything works ok: Create AVD Select Phone: Nexus 5x System with VT-x select Image x86. Weak system select arm Kitkat…
-
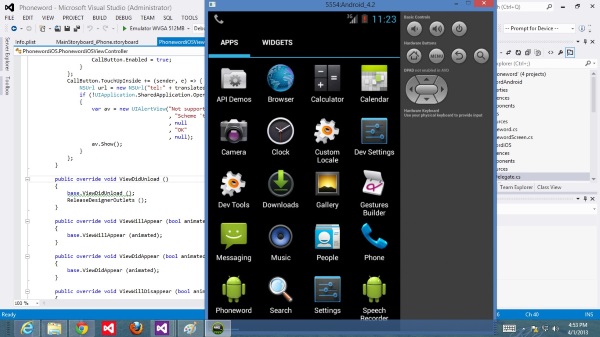
Visual Studio – Xamarin – Android programming – 78 Videos
Start learning android programming with Visual Studio IDE under Xamarin platform
-

3 Apps that everyone must have when traveling abroad
1. Google Maps Android: https://play.google.com/store/apps/details?id=com.google.android.apps.maps&hl=en iOS: https://itunes.apple.com/en/app/google-maps/id585027354?mt=8 Google maps Offline Maps: https://support.google.com/gmm/answer/3273567?hl=en 2. Google Translate Android: https://play.google.com/store/apps/details?id=com.google.android.apps.translate&hl=en iOS: https://itunes.apple.com/en/app/google-translate/id414706506?mt=8 Google Translate Offline: https://support.google.com/translate/answer/6142473?hl=en 3. Trip advisor Android: https://play.google.com/store/apps/details?id=com.tripadvisor.tripadvisor&hl=en&referrer=utm_download_tracking=Brand_AppPage_0_13091#_=_ iOS: https://itunes.apple.com/us/app/tripadvisor/id284876795?mt=8#_=_ 4. More Apps for downloading offline maps: HERE Maps: https://play.google.com/store/apps/details?id=com.here.app.maps Maps Me: https://play.google.com/store/apps/details?id=com.mapswithme.maps.pro Based on: http://www.geektime.co.il/travel-apps-offline/
-

Remote Mouse – Control your PC with your mobile phone
A great App that controls your PC by a mobile phone. Step 1: First install it on your mobile: Android Download: https://play.google.com/store/apps/details?id=com.hungrybolo.remotemouseandroid iOS Download: https://itunes.apple.com/us/app/remote-mouse-free-wireless/id385894596?mt=8 Step 2: Install a client on your PC: http://www.remotemouse.net/
-

Top 16 useful Android apps
Esential to every Mobile phone Moovit Wifi analyzer Dualingo Fast notes fj Snapseed Truecaller Noknok Whatsapp Facebook TrackID Clean Master Shazam Sports Tracker Skype Waze Dropbox No App Name Description 1 Next Bus & Train Info 2 Shows the Wi-Fi channels around you. Helps you to find a less crowded channel for your wireless router.…
-

Media Center – Raspberry PI – Kodi – XBMC
1. Download Image of openElec for Raspberry Note: You need to follow the steps below by the following order exactly http://openelec.tv/get-openelec then goto paragraph of “RaspberryPi Builds” and download DISKIMAGE file. 2. Open the compressed file from #1 3. Install the compressed file from #1 on SDCard as follows a. Download: http://sourceforge.net/projects/win32diskimager/ b. Install win32diskimager. c. Run C:Program…
-

Mobile development resources
Native Android 01 – 77 videos (Dec/2014) https://www.thenewboston.com/videos.php?cat=278 02 – 200 videos (Aug/2011) https://www.thenewboston.com/videos.php?cat=6 03 – 25 videos Android Development for Beginners 04 – 42 videos Android Development Tutorial 05 – 29 videos How to Make Android Apps Apple 01 – https://www.thenewboston.com/videos.php?cat=28 Multi Platform 01 – MS Visual Studio – Apache Cordova Template 02 – PhoneGap 03 – Intel…