Category: Electronics
-

KVM from AliExpress
KVM Switcher Keyboard Mouse Printer KVM Shared Controller Plug and Play USB Switcher Splitter Display Equipment for 2 PC Sharing PDF
-
Xiaomi MI Air2 se
Aliexpress Youtube Spec Usage: Reset – Press both hears pods while at case, for 7 sec, then pair. Functions of the touch sensors: Button left earpiece right earpiece Play/Pause – Touch twice Accept/end calls Touch twice Touch twice Activate voice assistant Touch twice – Play/Pause (Mono mode) Touch twice Touch twice
-

Kendryte K210 Hardware and Programming Environment
The K210 is an MCU launched last year by Canaan. It features a self-developed neural network hardware accelerator KPU that can perform convolutional neural network operations with high performance. Get Started with K210: Hardware and Programming Environment Keywords AI CNN Conventional neural network
-
Electronics
Logic: Gates / Boolean expressions / Truth Table 6 Videos youtube – Heb Analog: Diodes 5 videos youtube – Heb Testing Equipment: Oscilloscope 6 videos youtube – Heb Communication 232: USB <-/-> Rs232 FTDI / FT232R CP210x Drivers Amazon 4Projects.co.il MCU (Microcontrollers): ESP8266 – Wifi capable ESP32 – Wifi and bluetooth Pic SBC (Single board…
-

Projects based on Raspberry PI
General This post will be continuously updated with Raspberry pi projects. Design electronics boards or use Arduino or Raspberry pi and experiment it in virtual lab https://circuits.io/ Posts at Flash-jet.com Raspberry pi related articles ANDROID TV ON RASPBERRY PI SBC AND RASPBERRY PI CENTRAL LINKS PAGE RASPBERRY PI WITH 3.5 INCH LCD TFT SCREEN RASPBERRY…
-
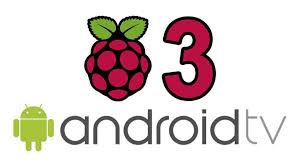
Android TV on Raspberry pi
General This post will gather all Android TV – Raspberry Pi related infor. XDA Developers Raspberry pi info Open Gapps RaspEX for Raspberry Pi Downloads More on RespEx Git it till it hertz All Raspberry related articles All Android TV related articles Raspberry pi+Android TV Android 7.1 Nougat on Raspberry Pi 2 & 3 |…
-
SBC and Raspberry PI central links page
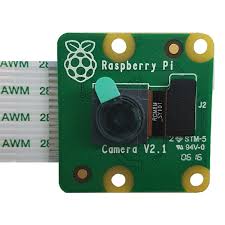
Parts and accessories All type of Accessories WIKI Raspberry Pi and Accessories More RASPBERRY PI WITH 3.5 INCH LCD TFT SCREEN RASPBERRY PI CAMERA MODULE V2 INSTALL TENSORFLOW ON RASPBERRY PI AND CLASSIFY IMAGES RASPBERRY PI 3 IS HERE PI-TOPCEED, THE FIRST $99 RASPBERRY PI DESKTOP! RASPBERRY VERIFIED PERIPHERALS HOW TO BUILD OPEN-ELEC KODI MEDIA…
-
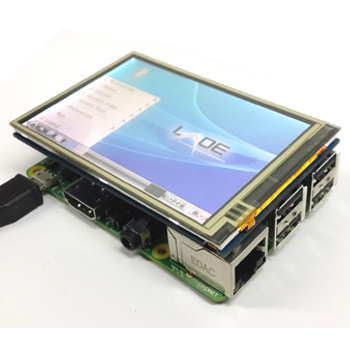
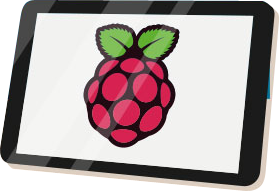
Raspberry PI with 3.5 inch LCD TFT screen
Raspberry pi youtube platlist – tips Tip & Tricks SSH RPI RPI = Raspberry PI First make sure you are able to SSH the RPI Assuming desktop Stretch operating system is running Download PUTTY and install Identify your RPI ip address. Connect to RPI Default credentials: Username: pi Password: raspberry How to copy files by SSH (pscp.exe) Install MC (Midnight…
-
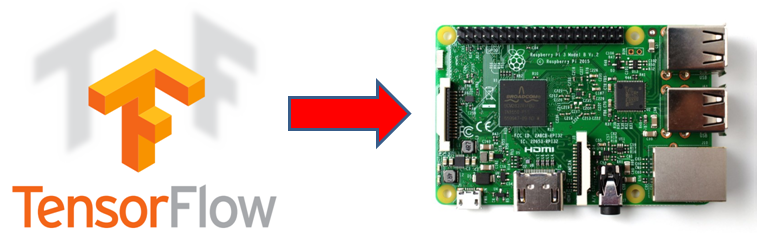
Install Tensorflow on raspberry pi and classify Images
Steps: Download Raspbian strech with desktop from RaspberryPi Unzip downloaded image. Using Win32DiskImager, flash a SDCARD (minimum 8GB) with downloaded Raspbian Stretch. Power up rasphberry pi with: Usb Mouse and Keyboard. Hdmi monitor SdCard MicroUsb Power spply Case of using Raspberry pi 2, plugin also usb wifi dongle. Let the Raspberry Pi power up till…
-

Testing and Amateur lab electronics equipments
Test Equipments Oscilloscope Orignal JYE Tech DS0150 15001K DSO-SHELL DIY Digital Oscilloscope Kit With Housing All-sun EM125 25MHz 2 in1 Mini Handheld Digital Oscilloscope + Multimeter Price: 107 usd DANIU ADS5012H Digital 2.4-inch TFT Screen Anti-burn Oscilloscope 500MS/s Sampling Rate 100MHz Analog Bandwidth Support Waveform Storage and Built-in Large 3000mah Capacity Lithium Battery Re seller:…
-

Wifi Controller ESP8266 – ESP32
ESP826 Wiki ESP826 Wifi Remote Control using ESP8266 Internet of things with ESP8266 Datasheet Wifi Dev kits http://www.wemos.cc/ http://nodemcu.com/index_en.html ESP32 Introduction: ESP32 is already integrated antenna and RF balun, power amplifier, low-noise amplifiers, filters, and power management module. The entire solution takes up the least amount of printed circuit board area. This board is used…
-

From Geektime: Run chromeOS on virtualbox, new arduino board, 90% diagnosis for cancer
Virtual Box New Arduino Board Health Run Chrome OS on VirtualBox New Arduino board Cancer Diagnosis 90% accuracy
-
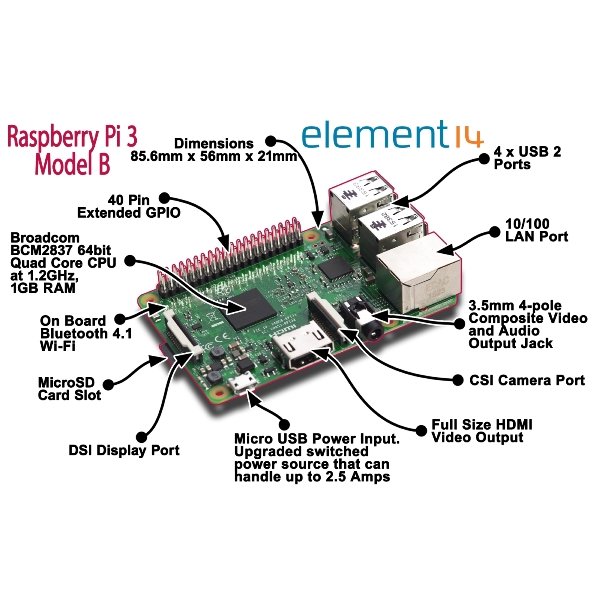
Raspberry PI 3 is here
Raspberry Pi 3 Model B Quad Core 1.2GHz 64bit CPU 1GB RAM WiFi & Bluetooth 4.0 Built on the latest Broadcom 2837 ARMv8 64bit processor, the new generation Raspberry Pi 3 Model B is faster and stronger than its predecessors. With built-in wireless and Bluetooth connectivity, it becomes the ideal IoT-ready solution. FEATURES: 1.2GHz QUAD…
-

How to Build Open-Elec Kodi Media Center based on Raspberry Pi
The following guide is a very suggested configuration for Open-Elec based on Raspberry pi Media Center: Buy the following item: Wifi Adapter: Tenda W311MI Tenda W311M Realtek SD Card (Use maximum 16GB) USB Power Adapter Case 1 Case 2 Raspberry Pi Board (Quad Code 1GB ram) 1 Raspberry Pi Board (Quad Code 1GB ram) 2 Read The following Guide about…
-
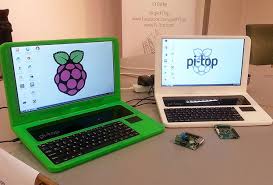
pi-topCEED, the first $99 Raspberry Pi desktop!
pi-topCEED is the world’s most affordable way to use and learn with the Raspberry Pi. It comes ready to plug and play and includes a Raspberry Pi 2 so you can dive in to STEM (Science, Technology, Engineering, and Math) right away, all for just $99! pi-topCEED is a modular desktop. This means, just like…
-
Raspberry Verified Peripherals
SDCard Use maximum 16GB of SDCard cause raspberry PI doesn’t support above it. WIFI Wifi Adapters – http://elinux.org/RPi_USB_Wi-Fi_Adapters Top 5 wifi adapters for Raspberry – http://www.htpcbeginner.com/raspberry-pi-wifi-adapters-xbmc-kodi/ https://thepihut.com/collections/raspberry-pi-wifi Hardware Verified Peripherals: http://elinux.org/RPi_VerifiedPeripherals Remote Control CEC – Consumer Electronics Control: http://kodi.wiki/view/CEC http://bit.ly/20WGl3l
-
OpenFL Open Source Games and Applications platform
OpenFL is a free and open source software framework and platform for the creation of multi-platform applications and video games. OpenFL programs are written in a single language (Haxe) and may be published to Flash movies, or standalone applications for Microsoft Windows, Mac OS X, Linux, iOS, Android, BlackBerry OS, Firefox OS, HTML5 andTizen (from wikipedia). http://www.openfl.org/ …
-
element 14 – Touch screen for Raspberry Pi
The 7” Touchscreen Monitor for Raspberry Pi gives users the ability to create all-in-one, integrated projects such as tablets, infotainment systems and embedded projects. The 800 x 480 display connects via an adapter board which handles power and signal conversion. Only two connections to the Pi are required; power from the Pi’s GPIO port and…
-
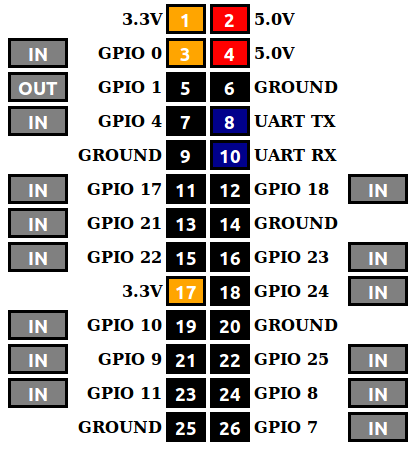
WiringPi – GPIO Library
WiringPi is a GPIO access library written in C for the BCM2835 used in the Raspberry Pi. It’s released under the GNU LGPLv3 license and is usable from C and C++ and many other languages with suitable wrappers (See below) It’s designed to be familiar to people who have used the Arduino “wiring” system1 Read more…
-

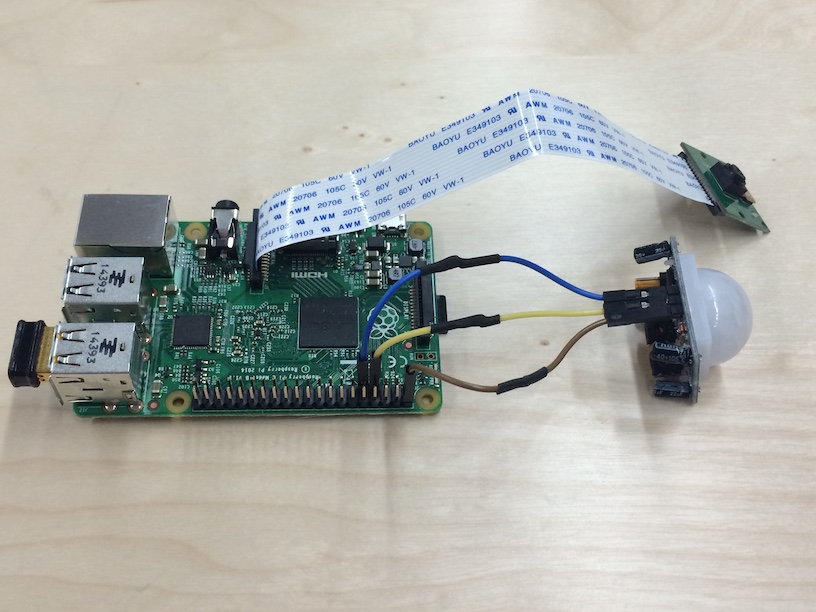
PiOT 101: Raspberry Pi + Internet of Things
List of Interesting projects: PiOT 101: Raspberry Pi + Internet of Things Tutorial: Your Sensors and Single-Board Computers Speak Emoji Build A Low-Cost Home Surveillance Camera With A Raspberry Pi More projects Based on: http://blog.initialstate.com/tutorial-piot-101-raspberry-pi-internet-of-things/
-
installing OpenCV 3.0 on raspberry pi b+
installing OpenCV 3.0 on raspberry pi b+ http://raspberrypi.stackexchange.com/questions/27232/installing-opencv-3-0-on-raspberry-pi-b qt-opencv-multithreaded A simple multithreaded OpenCV example application using the Qt framework. https://code.google.com/p/qt-opencv-multithreaded/
-
WebIOPi – Internet of Things framework
Control, debug, and use your Pi’s GPIO, sensors and converters from a web browser or any app WebIOPi is the perfect Swiss-knife to make connected things Developed and provided by Eric PTAK (trouch) Runs on Raspberry Pi Tutorials WebIOPi Community Forum Developer’s Blog (Eric/trouch) Links: Google Code: https://code.google.com/p/webiopi/ Blog: http://trouch.com/ Video of WebIOPi: https://www.youtube.com/watch?v=0i2C3Qagosc&feature=youtu.be
-
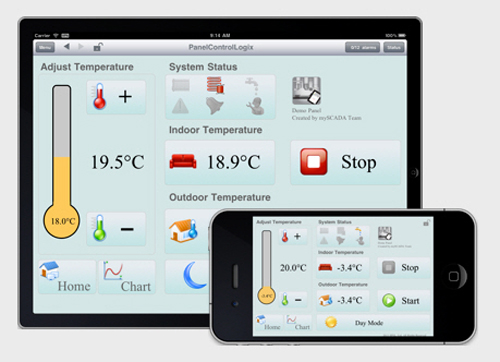
MyScada – supervisory control and data acquisition
SCADA (supervisory control and data acquisition) is a system operating with coded signals over communication channels so as to provide control of remote equipment (using typically one communication channel per remote station). The control system may be combined with a data acquisition system by adding the use of coded signals over communication channels to acquire…
-
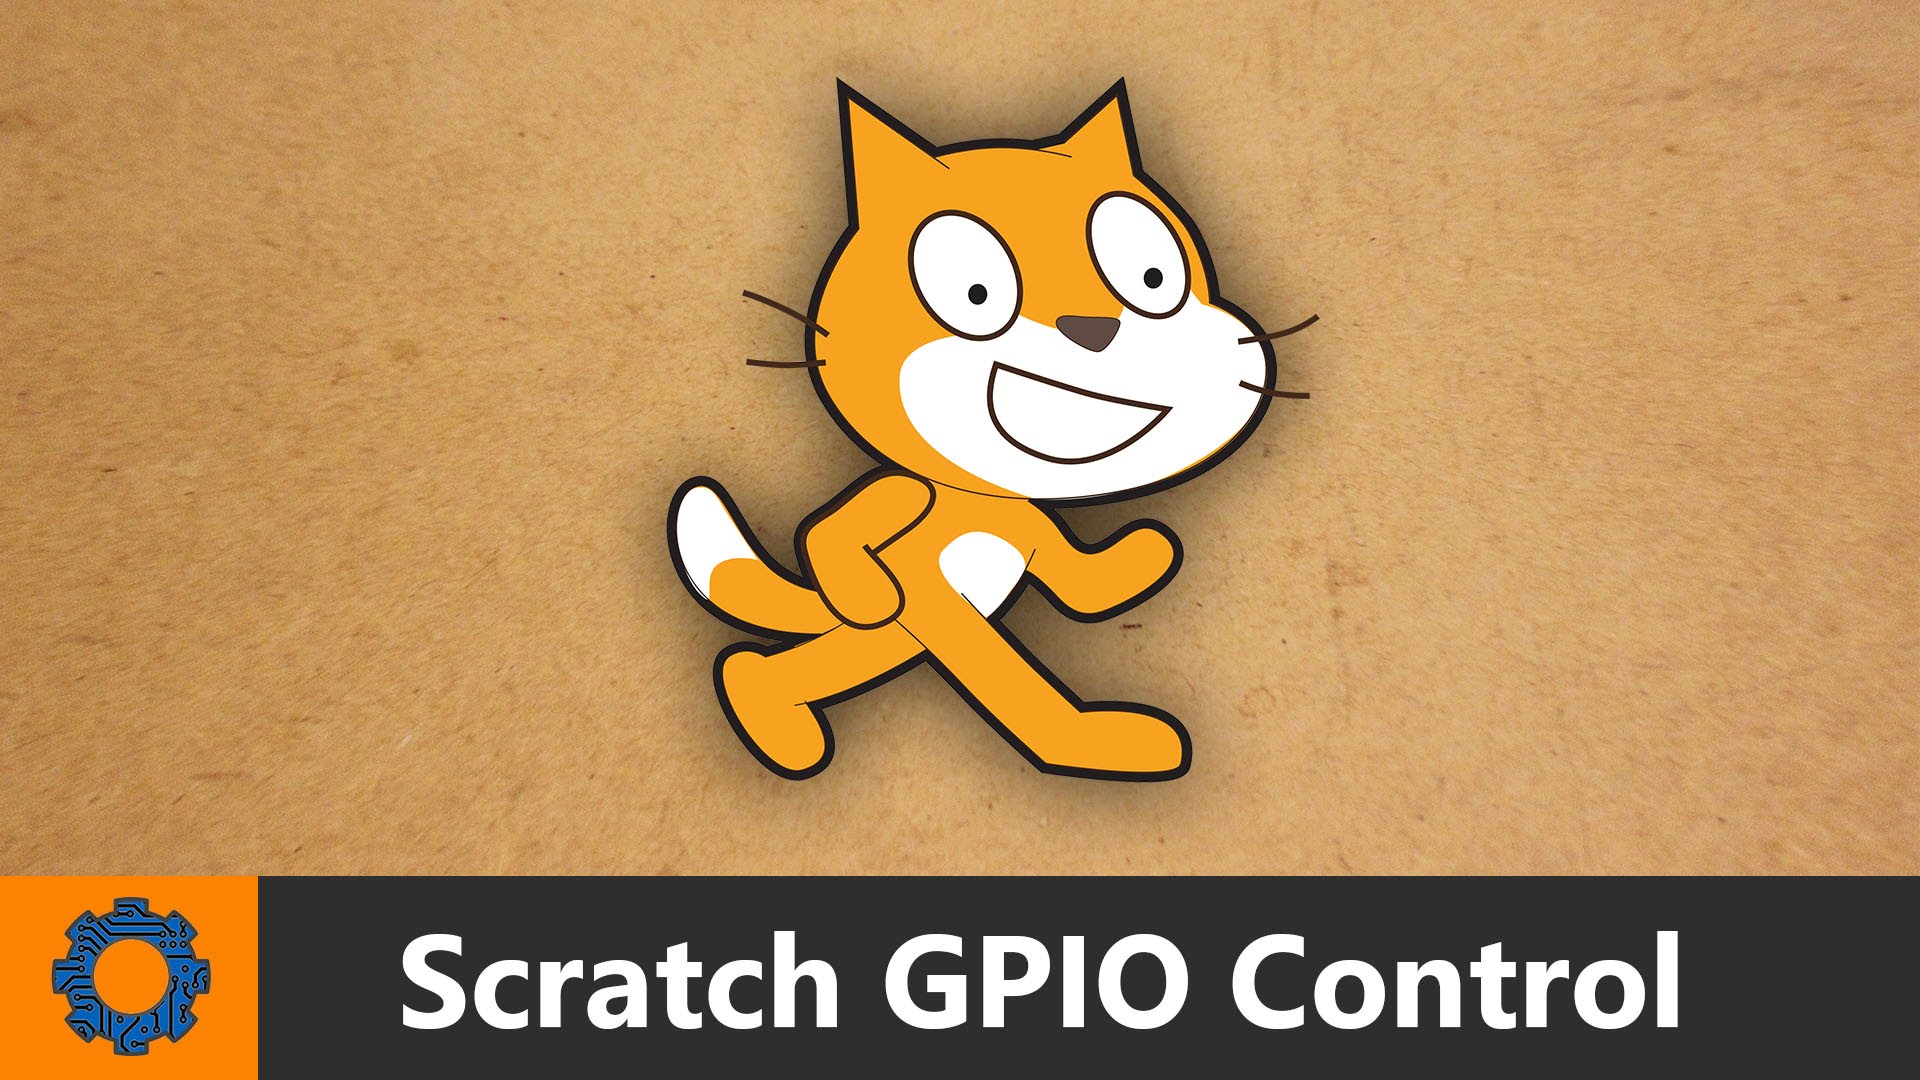
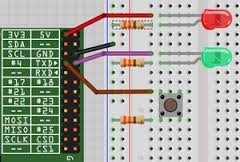
Scratch GPIO – Raspberry – First Steps
At this post here, a demo of how to blink a Led with scratch on Raspberry will be explained. Although this post is for beginners, it is suggested to have a previous experience with programming in general and programming by python and Scratch in specific. Learn Scratch Learn Python – Code Academy Step 01 –…
-
List of projects – Raspberry – Arduino
Robots related projects Navigation and Obstacles Avoidance The RR.O.P. – RaspRobot OpenCV Project Car Lab Obstacle detection using OpenCV Code on GitHub Autonomous bottle recycling robot Tracking and Recognition Basic motion detection and tracking with Python and OpenCV Raspberry Pi and the Camera Pi module: face recognition tutorial Tutorial: Using CamShift to Track Objects in…
-
Raspberry – Install Noobs and other Operating systems
Noobs Install Download Noobs from here. Extract the Zip. Download SD Formatter from here and Install it. Format the Sd Card. Copy the Extracted files to Sd Card. Connect to Raspberry: Sd Card, HDMI Network, Mouse, Keyboard, and Power supply. The system will boot. A menu with selection operating system will appear. Note: Raspbian: Username: pi Password:…