NoNameDescriptionCategoryTypePrice
1DuplicatorWordPress Migration Plugin, ability to backup, duplicate siteITPluginFree
2AceIDEAceIDE is a code editorIDEPluginFree
3Content ControlContent Control – User Access Restriction Plugin
SecurityPluginFree
4Login Logout MenuWith this plugin you can now add a real log in/logout item menu with autoswitch when user is logged in or not.SecurityPluginFree
5Duplicate PageDuplicate Posts, Pages and Custom Posts easily using single click.ProductivityPluginFree
6Nav Menu RolesThis plugin lets you hide custom menu items based on user roles.ProductivityPluginFree
7Elementor Website BuilderWordPress website builderWeb designerPluginFree / Pro-Paid
8External LinksManage all external & internal links on your site.ProductivityPluginFree
9SQL Chart BuilderThe plugin can create charts based on your SQL queries, then you can use those charts in any part of your website.
You can use both native wp and non-wp mysql tables in your queries.
Has option for using parameters.
BI, Chats, DataPluginFree
10Simple Table ManagerSimple Table Manager enables editing table records and exporting them to CSV files through a minimal database interface from your dashboard.BI, Chats, DataPluginFree
11GitiumGitium enables continuous deployment for WordPress, integrating with tools such as Github, Bitbucket or Travis-CI. ProductivityPluginFree
12Tawk.To Live ChatFREE live chat app that lets you monitor and chat with visitors on your WordPress site. ProductivityPluginFree
13Recent Posts Widget ExtendedAllows you to display a list of the most recent posts ProductivityPluginFree
14TablePressTablePress allows you to easily create and manage beautiful tables.Productivity, BI, Chats, DataPluginFree
15WP Charts and Graphs – WordPress Chart PluginWP Charts and Graphs plugin gives you a chart generator on your WordPress admin.
Only for data entered manually.
BI, Chats, DataPluginFree
16WP Business Intelligence LiteAllows you to display responsive data tables and charts on your website. Allows you to connect with a wordpress database and display the data in real time.
Has option for using parameters.
Only in Pro
Has also options for displaying a table.
BI, Chats, DataPluginFree / Pro-Paid
17TabulateSimple user-friendly interface to manage tables in your database.BI, Chats, DataPluginFree
NoNameDescriptionCategoryTypePrice

Development

[shortcode param1='param 1 value' param2='param 2 value']

Read parameters:

function shortcode_function($atts)
{
echo $atts['param1']; //param 1 value will be displayed.
echo $atts['param2']; //param 2 value will be displayed.
}
  • Example 1
    • /*
      Plugin Name: Shortcode demo
      Plugin URI:
      Description: Shortcode Demo
      Version: 1.0
      Author: Gabriel Magen
      Author URI: http://www.flash-jet.com
      License: GPLv2
      *

How to

  • Add a language
    • Go to HERE
    • Locate requested language
    • Click on “View team page
    • Click on “Download language pack
    • Upload the downloaded file to wp-content\languages
    • At wordpress admin panel, go to Settings->General
      • Select the required language
  • Add to wp-config.php, after define(‘DEBUG’,off);, the following line:
    • define(‘FS_METHOD’,’direct’);
    • At the following picture FS_METHOD appears twice, the white is not legal and the yellow is legal.
  • Click on the following video that demonstrates this.
  • Install
    • Go to Woocommerce.com
    • Download plugin and install from there.

Plugins

  • Elementor
  • WpIde
  • AceIde
  • Steps
    1. For this purpose install and activate the following two plugins
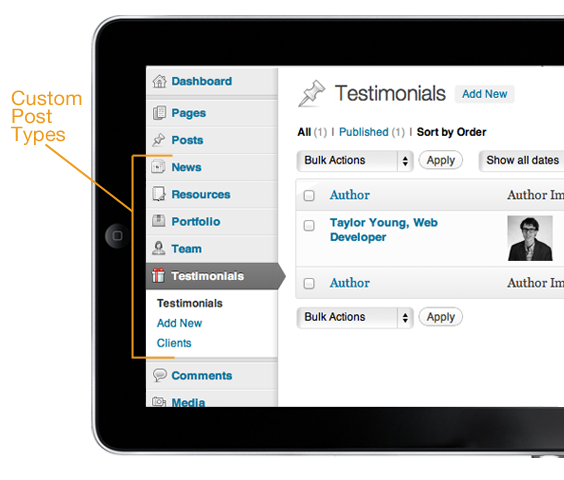
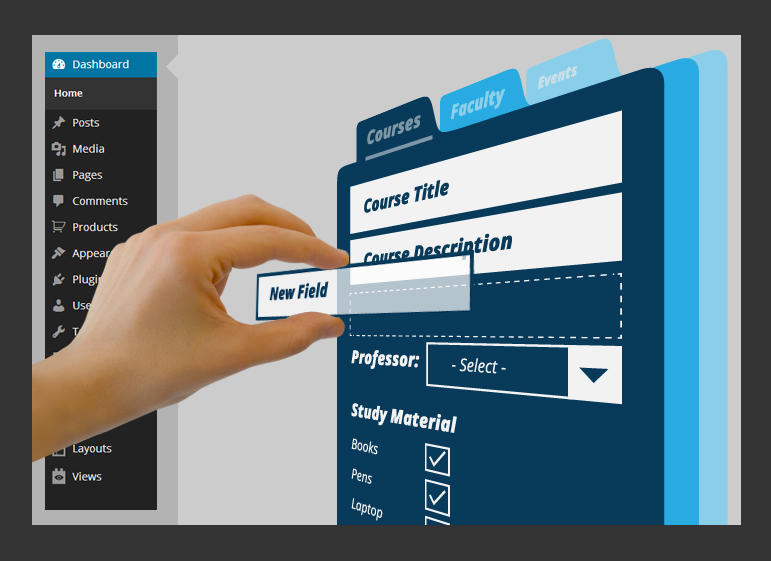
    2. Advanced Custom Fields
    3. Advanced Custom Post Types
    4. Under wordpress admin page, find menu item called “Content Types”
    5. Create the type you want.
    6. Under “Custom fields” create field group.
    7. At the selected field group, create under location, a rule that connects type to fields.
  • Veiw more info at the following POST.
  • This post explains how to Push (put/upload updated code) to Bitbucket and how to Pull (get/download) updated code from bitbucket:
    1. Pull from Bitbucket directly into wordpress
      1. Use plugin at Github project called github-updater.
      2. View the following Youtube Video of how to configure github-updater to download a Plugin from GitHub or BitBucket.
    2. Push to Bitbucket directly from WordPress, I don’t know yet.
  • Geektime: Github, Gitlab, Bitbucket

http://researchasahobby.com/best-security-plugin-for-wordpress-combination/

wordpress-security-comparison

3 plugins to secure wordpress website

  • Theme Authenticity Checker (TAC)
  • Exploit Scanner
  • Sucuri

9 plugins dealing with wordpress security

3 Best WordPress Security Plugins of All Time

  • Wordfence Security
  • iThemes Security
  • Bulletproof Security
  • Google Authenticator
  • Stealth Login Page
  • All In One WP Security & Firewall
  • Sucuri Security – SiteCheck Malware Scanner

The most advanced frontend drag & drop page builder. Create high-end, pixel perfect websites at record speeds. Any theme, any page, any design.

Faster than others

No more drag, drop & wait. Elementor lets you design on the frontend with instant, real time results

Free & open source

Elementor is the first full free & open source frontend page builder, that includes full access to all the design features you might need

Easy to use

Every control has been meticulously selected to provide the best user experience, and allow you to design at record speeds

No coding

Reach high-end designs, without coding. The resulting page code is compact & optimized for every device and screen

Read the following post in order to be able to limit editing and viewing post or post-types to post creator only:

01. https://premium.wpmudev.org/blog/how-to-limit-the-wordpres-posts-screen-to-only-show-authors-their-own-posts/

02. This is the plugin:

<?php
/*
Plugin Name: Simplify Post Edit List
Description: Show only the author's posts in the edit list
Version: 0.1
License: GPL
Author: Sarah Gooding
Author URI: http://untame.net
*/

function mypo_parse_query_useronly( $wp_query ) {
    if ( strpos( $_SERVER[ 'REQUEST_URI' ], '/wp-admin/edit.php' ) !== false ) {
        if ( !current_user_can( 'update_core' ) ) {
            global $current_user;
            $wp_query->set( 'author', $current_user->id );
        }
    }
}

add_filter('parse_query', 'mypo_parse_query_useronly' );

03. The line in red can be modified as follows:

a. Limit to Edit: strpos( $_SERVER[ 'REQUEST_URI' ], '/wp-admin/edit.php' ) !== false
b. Limit to All admin area: strpos( $_SERVER[ 'REQUEST_URI' ], '/wp-admin' ) !== false
c. Limit to All admin area: strpos( $_SERVER[ 'REQUEST_URI' ], '/[Post-Type here]' ) !== false
d. Combination of IF: 
if ( strpos( $_SERVER[ 'REQUEST_URI' ], '/wp-admin' ) !== false || 
strpos( $_SERVER[ 'REQUEST_URI' ], '/wp-admin/edit.php' ) !== false || 
strpos( $_SERVER[ 'REQUEST_URI' ], '/[post-type]' ) !== false )


  • Siteground tutorials:

https://www.siteground.com/tutorials/wordpress/

  • Keywords
    • Admin bar
    • Remove admin bar wordpress
  1. Advance Custom Fields
  2. Display ACF values at a post
    • Method 1
    • Metod 2
      • Use Short codes
      • Example: [acf field="{$field_name}"]
  3. How to Disable the Gutenberg WordPress Editor

Top 16 Best Looking jQuery Mobile Themes

Convert CSS to RTL

The simplest way is to add the following to each class of CSS:

  • direction: rtl; /* Align text to right */
  • float: right; /* the text will flow from right */
  • text-align: right; /* the text will be aligned from right */


WordPress themes

In general you can browse to wordpress developer resources.

1. Create a directory under your wordpress root\wp-content\plugins\ShortcodeDemo.

2. Create file called ShortcodeDemo.php.

3. Paste to ShortcodeDemo.php the following content:

<?php
/*
Plugin Name: Shortcode demo
Plugin URI:
Description: Shortcode Demo
Version: 1.0
Author: Gabriel Magen
Author URI: http://www.flash-jet.com
License: GPLv2
*/

add_shortcode( ‘fj’, ‘ch2ts_twitter_feed_shortcode’ );

function ch2ts_twitter_feed_shortcode( $atts ) {
$output = ‘<a href=”http://www.flash-jet.com”>
Flash-Jet</a>’;
return $output;
}

?>

4. Goto wordpress plugins and activate Shortcode demo plugin.

5. Create a post and write there [fj].

6. View the post at wordpress frontend and see the effect.

Visual Composer page builder plugin for WordPress – take full control over your site. Build any layout you can imagine with intuitive drag and drop editor – no programming knowledge required.

http://vc.wpbakery.com/

http://codecanyon.net/item/visual-composer-page-builder-for-wordpress/242431

WHY VISUAL COMPOSER IS THE BEST PAGE BUILDER FOR WORDPRESS?

Visual Composer features huge set of amazing premium plugin options like drag and drop interface, backend and frontend editors, exclusive add-ons built with our API, template manager, powerful grid builder and more.

Thanks to these unique features, you can manage your WordPress site content easily without spending hours and hours to keep your site up to date. Moreover – now you can build your own WordPress site without coding and getting into shortcodes which is a truly unique experience you have been waiting for. Thanks to regular updates of Visual Composer the amount of premium class features is growing making Visual Composer an ultimate must-have tool for any WordPress site owner, designer or developer. Discover capabilities behind Visual Composer – drag and drop page builder.

General: Here a plugin that will display a list of posts will be demonstrated.

Read more about developer resources here: https://developer.wordpress.org/

Top-10-WordPress-Plugins-That-You-Need-To-Be-Using-In-2014


Step 01: Plugin name will be DisplayListOfPosts

Step 02: Create a directory under wordpress-root\wp-content\plugins\DisplayListOfPosts

Step 03: Create a file under that directory called: DisplayListOfPosts.php

Step 04: The the following content to the plugin file:

<?php

/*
Plugin Name: Display List of Posts
Plugin URI: http://www.flash-jet.com
Description: A plugin demo that will display list of Posts
Version: 1.0
Author: Gabriel Magen
Author URI: http://www.flash-jet.com
*/

?>

Step 05: From wordpress admin panel, activate the new plugin.

Step 06: Here an action of adding option to admin menu will be demonstrated. Add the following code to file:

//adding action to admin menu and bind it to function name

add_action(‘admin_menu’,’DisplayListOfPosts_admin_actions’);

function DisplayListOfPosts_admin_actions() {

add_options_page(‘Display List Of Posts’,’Display List Of Posts’,’manage_options’,__FILE__,’DisplayListOfPosts_admin’);

//add_options_page(HTML Page title,Settings Submenu,hook only admin can see,php constant,function that will display the posts list);

}

function DisplayListOfPosts_admin() {

}

Step 07: Replace function DisplayListOfPosts_admin()  with the following::

function DisplayListOfPosts_admin() {

global $wpdb; //wpdb wordpress database class
$mytestdata=$wpdb->get_results(“select ID,post_title from $wpdb->posts”); //get a query into wpdb class
echo “<br>Display list of posts:<br>”;

echo “<table border=1>”;//display the results as a table

foreach ($mytestdata as $singleraw) //loop inside the query
{
echo “<tr>”;
echo “<td>”.$singleraw->post_title.”</td>”;
echo “<td>”.$singleraw->ID.”</td>”;
echo “</tr>”;
}

echo “</table>”;

}

images (6)


Step 08: Final code:

<?php

/*
Plugin Name: Display List of Posts
Plugin URI: http://www.flash-jet.com
Description: A plugin demo that will display list of Posts
Version: 1.0
Author: Gabriel Magen
Author URI: http://www.flash-jet.com
*/

add_action(‘admin_menu’,’DisplayListOfPosts_admin_actions’);

function DisplayListOfPosts_admin_actions() {

add_options_page(‘Display List of Posts’,’Display List of Posts’,’manage_options’,__FILE__,’DisplayListOfPosts_admin’);
}

function DisplayListOfPosts_admin() {

global $wpdb;
$mytestdata=$wpdb->get_results(“select ID,post_title from $wpdb->posts”);
echo “<br>Display list of posts:<br>”;

echo “<table border=1>”;
foreach ($mytestdata as $singleraw)
{
echo “<tr>”;
echo “<td>”.$singleraw->post_title.”</td>”;
echo “<td>”.$singleraw->ID.”</td>”;
echo “</tr>”;
}
echo “</table>”;

}
?>

Based on:

Here I will demonstrate how to build a wordpress plugin that will add prefix and suffix to each post content.

Step 01:

The name of the plugin that will be created here will be called PreSuff (Prefix / Suffix).
Create a directory for plugin under wordpress-root\wp_content\plugins. The directory name will be presuff.
So under wordpress root directory We will have: \wp_content\plugins\presuff.

Step 02:

Create a file called presuff.php. the content of the file will be:

<?php

/*
Plugin Name: PreSuff plugin
Plugin URI: http://www.flash-jet.com
Description: A plugin demo that adds prefix and suffix to post content.
Version: 1.0
Author: Gabriel Magen
Author URI: http://www.flash-jet.com
*/

?>

Step 03:

Add a filter:
add_filter(‘the_content’, ‘presuff’);

Step 04:

Add a function:
function presuff($content) {
$prefix= <<<PRE

<h3><center>Prefix to add to post<hr>

PRE;
$suffix= <<<SUFF

<h3><center>Suffix to add to post

SUFF;
return $prefix.$content.$suffix;
}

Step 05:

The whole file will look like the following:

<?php

/*
Plugin Name: PreSuff plugin
Plugin URI: http://www.flash-jet.com
Description: A plugin demo that adds prefix and suffix to post content.
Version: 1.0
Author: Gabriel Magen
Author URI: http://www.flash-jet.com
*/
add_filter(‘the_content’, ‘presuff’);

function presuff($content) {
$prefix= <<<PRE

<h3><center>Prefix to add to post<hr>

PRE;
$suffix= <<<SUFF

<h3><center>Suffix to add to post

SUFF;
return $prefix.$content.$suffix;
}
?>

Step 06: 

  • Activate the plugin.
  • Create a Post.
  • Result: the post include HTML content you wrote under $prefix and $suffix.


let’s create WordPress plugin the easy way:

01. Create plug-in template as follows:

  • Browse to http://wppb.me/ and generate plugin, this is Wordpress boilerplate generator  and generates OOP plugin.
  • Download the generated plug-in.
  • Install it.
  • In general here is a link to wordpress developer resources.

02. plugin code

  • Search plugin directory for string “public static function activate()“.
  • activation: in the activation phase we will install and create the wp_db table
  • find the “public static function activate()” and add code to create the db table
  • public static function activate() {
        /**Create an instance of the database class**/
        if (!isset($wpdb)) $wpdb = $GLOBALS['wpdb'];
        /**Set the custom table **/$table_name = $wpdb->prefix . "crud_links";
        $demo_browser_db_version = '1.0';
        /**Execute the sql statement to create or update the custom table**/
    
        if ( $wpdb->get_var("show tables like '$table_name'" ) != $table_name ) {
            $sql = "CREATE TABLE " . $table_name . " (
            ID int(11) NOT NULL AUTO_INCREMENT,
            Name varchar(255) DEFAULT NULL,
            Link varchar(255) DEFAULT NULL,
            LinkOrder int(11) NOT NULL,
            Description varchar(2255) DEFAULT NULL,
            OpenWindow tinyint(1) NOT NULL,
            PRIMARY KEY (ID)
            ) ENGINE=MyISAM DEFAULT CHARSET=utf8 AUTO_INCREMENT=5 ;";
            require_once(ABSPATH . 'wp-admin/includes/upgrade.php');
            dbDelta($sql);
            add_option( "my_plugin_db_version", '1.0' );
        }
    
    }
  • uninstall.php – when we remove the plugin this code will run
  • if ( ! defined( 'WP_UNINSTALL_PLUGIN' ) ) {
        exit;global $wpdb;
        $table_name = $wpdb->prefix . "crud_links";
        $sql = "DROP TABLE IF EXISTS $table_name;";
        $wpdb->query($sql);
        delete_option("my_plugin_db_version");
    }
    
  • wp hooks – admin menu
  • Search plug-in directory for string private function define_admin_hooks().
  • Add to this function the following line of code:

$this->loader->add_action( ‘admin_menu’, $plugin_admin, ‘admin_menu’ );

  • this will call the function in admin folder
  • Add the following code to php file under admin directory, not the index.php file, this will create admin page:
    public function admin_menu() {
        add_menu_page("CRUD Operation", "Links Crud", 1, "admin_linkesmenu", array($this,"admin_links_display"));
    }
    function admin_links_display()
    {
        include('partials/general-links-admin-display.php');
    }
    
  • Php file under Directory Admin\Partials, general-links-admin-display.php, Insert all html + php code and CRUD action you need for back-end.
 <? php

/**
 * Provide a dashboard view for the plugin
 *
 * This file is used to markup the public-facing aspects of the plugin.
 *
 * @link: http://www.flash-jet.com
 * @since 1.0.0
 *
 * @package General_Links
 * @subpackage General_Links/admin/partials
 */
 ?>

 <!-- This file should primarily consist of HTML with a little bit of PHP. -->

<?php
global $wpdb; 
/**Set the custom table **/
$table_name = $wpdb->prefix . "crud";


$CN =mysql_connect(DB_HOST,DB_USER,DB_PASSWORD) or die("Sorry Connection Problem");
$DB =mysql_select_db(DB_NAME,$CN) or die("Sorry Not Connect to Your Database");


if(isset($_POST['add']))
{
 $name=$_POST['name'];
 $link=$_POST['link'];
 $order=$_POST['order'];
 $description=$_POST['description'];
 $openwindow=$_POST['openwindow'];
 
 $sql="INSERT INTO wp_crud_links (`Name`, `Link`, `LinkOrder`, `Description`, `OpenWindow`) VALUES ('".$name."','".$link."','".$order."','".$description."','".$openwindow."')";
 $res=mysql_query($sql);
 if($res)
 {
 echo "<script>document.location='admin.php?page=admin_linkesmenu&msg=1'</script>";
 }
 else
 {
 echo "Error !";
 }
 
}

if(isset($_POST['Update']))
{
 $uid=$_GET['id'];

 $name=$_POST['name'];
 $link=$_POST['link'];
 $order=$_POST['order'];
 $description=$_POST['description'];
 $openwindow=$_POST['openwindow'];

 $sql="update wp_crud_links set Name='".$name."' , Address='".address."' , Mobile='".$mobile."' , Fileupload='".$image_name."' where ID='".$uid."'";
 $reg=mysql_query($sql);
 if($reg)
 {
 echo"<script>document.location='admin.php?page=admin_linkesmenu&msg=2'</script>";
 }
 else
 {
 echo"Error !";
 }
}
 
if($_GET['action'] == 'delete')
{

 $did=$_GET['id'];
 
 $sql1="delete from wp_crud_links where ID='".$did."'";
 $res1=mysql_query($sql1);
 if($res1)
 {
 echo"<script>document.location='admin.php?page=admin_linkesmenu&msg=3'</script>";
 }
 else
 {
 echo "Error !";
 } 
}
?>


<?php 
if(isset($_GET['action']) && ($_GET['action'] == 'edit'))
{
 $urid=$_GET['id'];
 $sql="select * from wp_crud_links where ID='".$urid."'";
 $reg=mysql_query($sql);
 $res=mysql_fetch_array($reg);
 $uname= $res['Name'];
 $ulink= $res['Link'];
 $uorder= $res['LinkOrder'];
 $udescription= $res['Description'];
 $uopenwindow= $res['OpenWindow'];
 
 ?>
 
<form name="add" action="" method="post">
<table cellpadding="5" cellspacing="5">
 <tr>
 <td>Name :</td>
 <td><input type="text" name="name" value="<?php echo $uname; ?>" /></td></tr>
 </tr>
 <tr>
 <td>Link :</td>
 <td><input type="text" name="link" value="<?php echo $ulink; ?>" /></td></tr>
 </tr>
 <tr>
 <td>Order :</td>
 <td><input type="text" name="order" value="<?php echo $uorder; ?>" /></td></tr>
 </tr>
 <tr>
 <td>Description :</td>
 <td><textarea name="description" rows="3" cols="50"> <?php echo $udescription; ?></textarea></td></tr>
 </tr>
 <tr>
 <td>Open in new window :</td>
 <td><input type="checkbox" name="openwindow" value="<?php echo $uopenwindow; ?>" <?php echo ($uopenwindow == 1 ? 'checked' : '') ?> /></td></tr>
 </tr>
 
 <td><input type="submit" name="Update" value="update" align="middle"/>
 <a href="admin.php?page=admin_linkesmenu" style="text-decoration:none;"><input type="button" name="cancel" value="Cancel" id="html-upload" align="middle"></a>
 </td>
 </tr>

</table>
</form>

<?php }elseif(isset($_GET['action']) && ($_GET['action'] == 'add'))
{ ?>
<hr>
<form name="add" action="" method="post">
 <table cellpadding="5" cellspacing="5">
 <tr>
 <td>Name :</td>
 <td><input type="text" name="name" /></td></tr>
 </tr>
 <tr>
 <td>Link :</td>
 <td><input type="text" name="link" /></td></tr>
 </tr>
 <tr>
 <td>Order :</td>
 <td><input type="text" name="order" /></td></tr>
 </tr>
 <tr>
 <td>Description :</td>
 <td><textarea name="description" rows="3" cols="50"></textarea></td></tr>
 </tr>
 <tr>
 <td>Open in new window :</td>
 <td><input type="checkbox" name="openwindow" value="1" /></td></tr>
 </tr>
 <tr>
 <td>
 <input type="submit" name="add" value="Add" align="middle"/>
 <a href="admin.php?page=admin_linkesmenu" style="text-decoration:none;"><input type="button" name="cancel" value="Cancel" id="html-upload" align="middle"></a>
 </td>
 </tr>
 
 </table>
</form>
 
<?php } else { ?>
<?php if($_GET['msg'] == 1) { ?>
<h2><center> Record Sucessfull Added</center></h2>
<?php } ?>

<?php if($_GET['msg'] == 2) { ?>
<h2><center> Record Sucessfull Updated</center></h2>
<?php } ?>

<?php if ($_GET['mag'] == 3){?>
<h2><center> Record Sucessfull Deleted</center></h2>
<?php } ?>

<div class="wrap" style="float:none;">
 <h2>Simple CRUD Operation
 <a class="add-new-h2" href="admin.php?page=admin_linkesmenu&action=add">Add New</a></h2>
</div>

<table cellspacing="0" class="wp-list-table widefat fixed pages">
 <thead>
 <tr>
 <th style="width:30px;" class="" id="" scope="col"><span>No</span></th>
 <th style="width:100px;" class="" id="" scope="col"><span>Name</span></th>
 <th style="width:100px;" class="" id="" scope="col"><span>Link</span></th>
 <th style="width:100px;" class="" id="" scope="col"><span>Order</span></th>
 <th style="width:200px;" class="" id="" scope="col"><span>Description</span></th>
 <th style="width:200px;" class="" id="" scope="col"><span>OpenWindow</span></th>
 <th style="width:200px;" class="" id="" scope="col"><span></span></th>
 </tr>
 </thead>
 <tbody id="the-list">
<?php
 $i = 1;
 $sqlg = "SELECT * FROM wp_crud_links ";
 //$resg = $wpdb->get_results($sqlg);
 //foreach ( $resg as $rowg ) 
 $resg = mysql_query($sqlg);
 
 if($resg === FALSE) { 
 die(mysql_error());
 }

 
 while($rowg = mysql_fetch_array($resg))
 { 
 $FileUpload=$rowg['FileUpload'];
 $rid=$rowg['ID'];
 
 echo '<tr valign="top">';
 echo '<td>'.$i.'</td>';
 echo '<td>'.$rowg['Name'].'</td>';
 echo '<td>'.$rowg['Link'].'</td>'; 
 echo '<td>'.$rowg['LinkOrder'].'</td>';
 echo '<td>'.$rowg['Description'].'</td>';
 echo '<td><input type="checkbox" '.($rowg['OpenWindow'] == 1?'checked':'').'/></td>';
 echo '<td><a href="admin.php?page=admin_linkesmenu&action=edit&id='.$rid.'" >Edit</a>&nbsp;||&nbsp;<a href="admin.php?page=admin_linkesmenu&action=delete&id='.$rid.'" onclick="javascript:return confirm(\'Are You Sure?\')">Delete</a></td>';
 echo '</tr>';
 $i++;
 } 
?>
 </tbody>
</table>
<?php } ?>
  • let’s create the front  end to display the data from the DB
  • public php in wp is done via shortcodes
  • private function define_public_hooks() add new line
  • $this->loader->add_action( 'init', $plugin_public, 'register_shortcodes' );


  • this will call register_shortcodes function in the public folder of the plugin
  • public function register_shortcodes() {
        add_shortcode( 'crud_links_operation', array( $this, 'shortcode_crud_links_operation' ) );
    }
    
  • this will call shortcode_crud_links_operation that will generate html to display in the shortcode
  • after we create the shortcode we can insert it to a post or or page
  • [crud_links_operation][/crud_links_operation] and go to wp post and she the html you inserted in the short code.


Learn how to develop WordPress Plugins

01  – Under <Wordpress-directory>wp-contentPlugins create a directory with the Plugin Name.

02 – There create a file <Plugin Name>.php

03 – Under WordPress plugins page the new plugin will be shown.

04 – Copy and paste the HelloWorld example below to <Plugin Name>.php file.

05 – Activate the Plugin from Plugins page.

06 – Your first plugin runs and displays “Hello World” at the top of WordPress admin area.

Example 1 - Hello World:
<?php
/**
* Plugin Name: HelloWorld
* Plugin URI: http://www.flash-jet.com
* Description: HelloWorld Example
* Version: 1.5
* Author: Gabriel Magen
* Author URI: http://www.flash-jet.com
* License: A "Slug" license name e.g. GPL12
**/

function hello_world()
{ 
    echo '<hr><b><center>Hello World !!!!!!!<hr>'; 
}

add_action("admin_head","hello_world");
?>

Read more about plugin development here: https://developer.wordpress.org/

How to Add A PHP Code to your WordPress Posts, Pages and Widgets

A very good youtube video that shows how to add php code into wordpress page.

The steps are:

1. Install ‘PHP Code Widget’ plugin.

2. Install ‘Insert PHP’ plugin.

3. Start writing php code inside wordpress pages and posts.

Here is a link to the original youtube video:
https://www.youtube.com/watch?v=-CYe0q1K45I


This plugin provides users with a to-do list feature.

You can configure the plugin to have private to-do lists for each user, to have all users share a to-do list, or to have a master list with individual completion of items. The shared to-do list has a variety of settings available. You can assign to-do items to a specific user (includes a setting to email a new to-do item to the assigned user) and optionally have those items only viewable by that user. You can also assign different permission levels using capabilities. There are also settings to show deadline and progress fields. Category support is included as well as front-end administration.